

INTRODUCTION
Back in July of 2019 AMD came up with their latest flagship, X series chipset, the X570. It was a huge step in the right direction, with the inclusion of PCIe GEN 4.0 and 8 USB 3.1 Gen2. But all these feature upgrades meant we saw a jump in the operating TDP of the chipset from a very optimized 4.8w in the X470 platform to 11w on the X570 which was higher than the 6.8w on the X370 platform. This bump in the TDP warranted the use of some active cooling solutions on the chipset. The introduction of the X570 chipset was quite polarizing, as it was a pretty expensive platform, and the next best option was the previous generation B450. To solve this dilemma AMD had to come up with a good middle ground, thus came the B550 platform, the “budget” option. The B550 platform had a few features stripped off of the X570 platform like, Gen 4 general purpose lanes as well as the Gen4 CPU chipset uplink.
Recently, NZXT, launched their first ever AMD based motherboard, which was a step away from their usual Z series line-ups based on the Z series chipsets from Intel. I was quite surprised to see NZXT come up with a budget chipset board, I was half expecting them to come out with a N7 based on the flagship X570 chipset. Anyways today we have the N7 B550 form NZXT with us here at Hardware Corpus and we are going to make it run through its paces.
SCOPE OF DELIVERY

The package was quite banged up by the time we received it, but what we can see this packaging would have looked absolutely awesome in the NZXT colors and the minimalistic design.

Contained within the external white branded box we find a brown, hard, card-board box. The box does its job of securing the board inside wonderfully.

Keeping aside the board for now we find another layer of cardboard separator, under which we find little packets containing all the included accessories and utilities.
BOX CONTENTS

The N7 packs with itself only the most essential items, I like this approach to reducing clutter. NZXT has managed to preserve its minimalistic approach even in its packaging.
The contents include-
-
N7 B550 Motherboard
-
2 X SATA Cables (90 degrees)
-
2 X SATA Cables (180 degrees)
-
2 X Wireless Antenna
-
2 X M.2 Screws
-
A Leaflet Manual
TECHNICAL SPECIFICATIONS
ParticularDescriptionSOCKETAMD AM4ProcessorsAMD Series: Ryzen 3, Ryzen 5, Ryzen 7, Ryzen 9Memory4 DIMM DDR4 SDRAM, 128 GB MAXIMUM FREQUENCIES:OC Frequency (Vermeer CPUs) 4666+ MHzOC Frequency (Matisse CPUs) 4666+ MHzOC Frequency (Renoir APUs) 4733+ MHzBase Frequency 3200/ 2933/ 2667/ 2400/ 2133 PCI-E slots1 x PCI Express 4.0 x16 (x16) – CPU1 x PCI Express 3.0 x16 (x8) – B5502 x PCI Express 3.0 x1 – B550M.2 slots1 x PCI Express 4.0 x4, SATA (Key M, 2242/2260/2280) – Ryzen 3rd Gen and higher CPU1 x PCI Express 3.0 x4 (Key M, 2242/2260/2280) – B550Display Outputs1 X HDMI 2.1PWM Headers7 X 4 pin PWM Placed Strategically.PS/2 Ports1 USB PortsOn the rear I/O:-1 X USB 3.2 Gen 2 (Type-C)3 X USB 3.2 Gen 2 (Type-A)4 X USB 3.2 Gen 1 (Type-A) Onboard/internal:-1 X USB 3.2 Gen 2 Header (Type-C) 1 X USB 3.2 Gen 1 Header (Can be split up to 2 ports)3 X USB 2.0 Header (Can be split Up to 6 ports) SATA6 x SATA 6Gb / s RAID0, 1,5, 10 (SATA), 0, 1 (M.2 NVMe)Built-in SoundCodec – Realtek® ALC1220 S / PDIFOptical (output)Networking CapabilitiesRealtek® RTL8125BG 2.5GARGB Header1RGB Header1BIOS ChipUEFI AMI BIOS, 256 Mb Flash ROM (MX25U25673G)TPM1x SPI (12 pin)Additional featuresPost LED (CPU, DRAM, VGA, BOOT LED), Flash BIOS & Clear Cmos Button.CLOSER LOOK
We are going to take a look at some of the provisions of the board, which are worth mentioning in this review.
APPEARANCE


NZXT has outdone itself with the aesthetics with this one. This board will tie in really nicely with the overall NZXT ecosystem, especially with the NZXT cam integration, NZXT RGB channels, and the overall minimalistic aesthetics.

The board features steel reinforcement on the primary X16 slot, which will cater nicely to the ever-increasing bulk of modern Graphics Cards.


The board features an absolutely tool-less approach to removing the M.2 slot covers. This is achieved with the use of two tiny yet quite power-ful magnets, and a notching system. In our unit the magnets were quite finicky and often slid away from their intended position, which made it quite annoying to be honest. As per our communications with NZXT, this unit was from the first run of production, since then, this issue has been noticed by NZXT. They have sorted out this issue with the implementation of a special sort of adhesive, which not only fixes this issue, but also prevents magnetic interference on the board.

On removing the M.2 slot covers we get access to the 2 X M.2 slots. Both of which support a maximum of 80 mm devices. A major issue here is that there is no M.2 Cooling whatsoever. This boils down to the fact that storage devices, that are installed in either of the M.2 slots, are going to take a hit in terms of thermals and that will eventually lead to lowered transfer speeds, especially with the newer GEN 4 storage devices.

This board features onboard power and reset buttons, which won’t be very useful for most of the day-to-day users, but this feature is an absolute God-send for the more advanced and experienced demographic.

The board has clear inscriptions showing the slot numbers for each memory stick, and it also uses small asterisks to mark out the slots that have to be filled out first, in order to utilize the benefits of the dual channel memory. This is an absolute boon for the more novice / first-time builders.

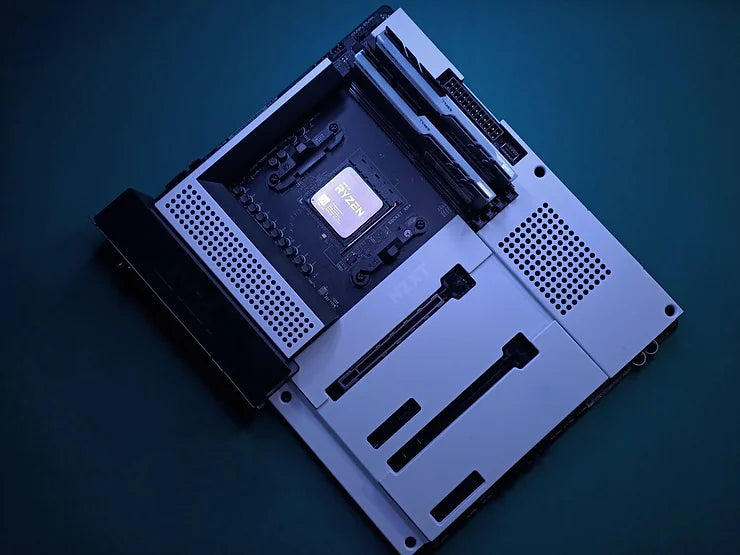
Here is a look at the B550 Chipset being used on the board.

The board uses Intel® Wi-Fi 6E AX210 (Gig+) wireless card for Wi-Fi and Bluetooth. It has a 2230 form factor and has a thickness of 2.4mm. This card supports 2.4Ghz, 5Ghz, 6Ghz, (160Mhz) wireless bands and is rated for speeds upto 2.4 Gbps. This boasts Wi-Fi 6E and Bluetooth 5.2 certifications. We also see support for technologies like MU-MIMO, Intel vPro® Technology & Orthogonal Frequency-Division Multiple Access (OFDMA).


The NZXT N7 B550 has a pretty “sound”, audio department (pun intended XD). Based around the pretty top-end Realtek® ALC1220 Codec, The N7 features 8 High Definition Audio Channels, backed by 5 Nichicon Fine Gold Series Capacitors. All these specs mean that the N7 is up there in terms of Audio.


The heatsinks are real chonkers and work absolutely as expected. We shall look into them in more detail in our Closer look at the VRM section.

This plastic I/O Cover cover predominantly features the NZXT logo. It’s pretty much the only plastic component used as an aesthetic prop.
REAR I/O

The board features a stupendous amount of USB ports, I was absolutely pleased to see it. From the left to right we have the BIOS flashback and Clear CMOS buttons, followed by a single HDMI 2.1 port, next we see 2 X USB 2.0 ports, succeeded by 1 X USB 3.2 Gen 2 Type A and another USB 3.2 Gen 2 Type C. Moving on we find 4 X USB 3.2 Gen 1 Type A (one of them marked out to denote the port that supports USB devices for BIOS flashbacks), followed by the host of 5.1 Channel Audio ports and one S/PDIF optical audio output.
Here, I would like to point out that, although I was pleased with the availability of USB ports, I was quite disappointed to see the inclusion of just a single display output (the HDMI 2.1 port). In today’s time, when Graphics cards are becoming excessively costly, we are seeing a constant trend of sticking with APUs in the initial days of the build, with hopes of upgrading to a discrete Graphics card in days to come. With the availability of APUs like the 5600G and the 5700G, we think it was a missed opportunity on the part of NZXT.
ONBOARD/INTERNAL I/O
TOP:-

From left to right we have:-
-
1 x 8 pin 12v EPS power,
-
1 x 4 pin 12v EPS power (Supplementary),
-
1 x 4 pin PWM fan header (Primarily allocated for CPU fan),
-
1 x 4 pin PWM fan header (Primarily allocated for AIO pump),
-
2 x 4 pin NZXT RGB headers,
-
1 x 4 pin PWM fan header (Marked as SYS_FAN 4),
-
1 x 4 pin PWM fan header (Marked as SYS_FAN 5),
SIDE:-


From left to right we have:-
-
1 x 19 pin USB 3.2 Gen 1 Header,
-
6 x SATA 6 Gbps Ports,
-
1 x 19 pin USB 3.2 Gen 1 Header,
-
1 x USB 3.2 Gen 2 Header (Type-C),
-
1 x 24-pin EATX Power,
Bottom:-

From left to right we have:-
-
1 x 9 pin Front Audio Header,
-
1 x 3 pin 5v Universal ARGB Header,
-
1 x 4 pin 12v Universal RGB Header,
-
3 x 4 pin PWM fan header (Labeled, SYS_FAN 1, SYS_FAN 2, SYS_FAN 3),
-
4 x Post LEDs designed to denote the failure of CPU/DRAM/BOOT/VGA in case the Computer doesn’t POST (Power On Self Test) successfully.
I miss the Q-LED readouts that NZXT used to use in their previous Z series-based N7 motherboards.
Overall, I love the minute details, like, how all the internal headers have been pushed out to the edges of the board. Also how the USB 3.2 headers are flipped at a 90-degree angle. All these minute details show how NZXT made cable management one of its first priorities.
TAKING THE BOARD APART

The board has a “shroud” covering up most of the PCB, this is mostly a design piece, targeted to score a few more brownie points in terms of aesthetics.

The white metal shroud is snapped onto a black plastic inner shell with the help of tiny friction tabs.

The black plastic casing is screwed down to the PCB using 10 screws, which are covered with a nonconductive ring/washer to avoid shorting out traces on the underside of the board.

The only pieces that were remaining were the I/O shield and VRM heatsinks, both of them are screwed onto the PCB with the help of 4 screws for the heatsinks and 2 different types of screws for the I/O cover and I/O shield.
CLOSER LOOK AT THE VRM SECTION

Before we dive into the details of the VRM section, we would like to make it clear, that NZXT has used Asrock as an OEM (Original Equipment Manufacturer). Therefore the N7 is pretty much an Asrock B550 board with all the NZXT bells and whistles. To be particular this board is essentially an Asrock B550 Steel Legend. Not to mention the VRM section also has some striking similarities with the aforementioned Asrock counterpart.

This board features a 12+2 phase VRM design, in reality, it is just a 6-Phase paired with ISL6617A couplers. The VRM is managed using the Renesas RAA229004 digital PWM controller. This controller supports a maximum of 6+2 power phases. The Mosfets being used are the 50A Vishay SiC654.

Here is a look at the RAA229004 controller being used on this board.

Here are the ISL6617A couplers, that I mentioned earlier.
VRM Thermals.
Temperatures are all around very good on the NZXT N7 B550. Sensible stock settings and good overclocked voltage accuracy mean that the CPU stays in check under a variety of operating frequencies.
And the big block of metal cooling NZXT’s solid quality Vishay VRM components does a good job to maintain very comfortable temperatures even in the most challenging situations with high ambient temps.
HARDWARE COMPATIBILITY ISSUES

This board has a massive hardware compatibility issue. While working with it, we couldn’t access the Type-C header. The main reason for the limited accessibility is that the Type-C header onboard is sunken pretty deep beneath the shrouding. So for any cases (For instance the Lian Li O11 Dynamic we used in our testing) that has a 90-degree Type-C cable, it will be absolutely impossible to access this header and its offerings. Other than this there are 2 more issues with the hardware compatibility issues we found, which were:-
-
No cooling for M.2 device and,
-
The finicky magnet mechanism for the M.2 slot covers.
We elaborated on either of these issues, in their respective places while discussing closer looks.
UEFI and UTILITY


The BIOS is almost the same as the Asrock BIOS albeit with some NZXT themes and colors. An apt description of the BIOS UI would be to state that, it is the Asrock BIOS with NZXT skins.
Testing and Benchmarks
Here are all the sensors that AIDA could pick up.

Here is the list of all the PCI-e devices being used on this board. We can also point out that this board uses the Realtek RTL8125 2.5GBe Ethernet controller.

Test Rig Configuration:-
Here is the breakdown of the components used in our test bench.
PROCESSORAMD Ryzen 5 4650GCOOLERMSI CoreLiquid 360MOTHERBOARDNZXT N7 B550 RAMANTEC KATANA Series 7GPUGALAX 1650 CASELIAN LI O11 DYNAMICPSUANTEC HCG 750W GOLDOS WINDOWS 10 PROBenchmarks
Geekbench 5 Single core:-
The benchmark was carried out in 3 different configurations,
-
Stock PBO Boost
-
4000 MHz
-
4200 MHz
-
4300 MHz
-
4400 MHz
In all these configs, the system memory was set at 4000 MHz (CL 18-20-20-42).
Geekbench 5 Multi-Core:-
The benchmark was carried out in 5 different configurations,
-
Stock PBO Boost
-
4000 MHz
-
4200 MHz
-
4300 MHz
-
4400 MHz
In all these configs, the system memory was set at 4000 MHz (CL 18-20-20-42).
Cinebench R23:-
The benchmark was carried out in 5 different configurations,
-
Stock PBO Boost
-
4000 MHz
-
4200 MHz
-
4300 MHz
-
4400 MHz
In all these configs, the system memory was set at 4000 MHz (CL 18-20-20-42).
Cinebench R15:-
The benchmark was carried out in 5 different configurations,
-
Stock PBO Boost
-
4000 MHz
-
4200 MHz
-
4300 MHz
-
4400 MHz
In all these configs, the system memory was set at 4000 MHz (CL 18-20-20-42).
7 ZIP:-
The benchmark was carried out in 5 different configurations,
-
Stock PBO Boost
-
4000 MHz
-
4200 MHz
-
4300 MHz
-
4400 MHz
In all these configs, the system memory was set at 4000 MHz (CL 18-20-20-42).
Aida 64 Memory & Cache Benchmark:-
The benchmark was carried out in 5 different configurations,
-
3200 MHz XMP Timings ( CL 16-18-18-38)
-
3600 MHz ( CL 16-18-18-42)
-
3800 MHz ( CL 19-21-21-42)
-
4000 MHz ( CL 19-22-22-42)
-
4200 MHz ( CL 22-24-24-45)
The CPU was set at 4.3 GHz from the BIOS at 1.38V.
Leave a comment
This site is protected by hCaptcha and the hCaptcha Privacy Policy and Terms of Service apply.